How to Use Touch Up Spray Paint on Car
Tips For Applying Touch Up Paint To Your Car
Although you might like nothing more than the feeling of the hot summer sun beating down on you as you work on your car, solar rays are anything but friendly to the successful outcome of a touch-up paint job. To avoid runny or distorted paint, do your painting in a cool and enclosed area such as a garage that has lower humidity.
As with any task you have never done before, you are likely to make mistakes at first. Just a little practice on a test card or a piece of cardboard can enable you to get your technique down pat before you start the real job.
Make sure the surface is clean and free of dirt or grease by using soap or grease remover. Eliminate all signs of rust with a wire brush or 220 grit sandpaper. Then apply an anti-rust cleaner. Dry the area thoroughly with a soft cloth or a hand dryer held about a foot away from the surface. Ideally, the drying temperature should be between 65 and 75 degrees Fahrenheit. Lower temperatures or higher humidity will lead to slower drying times. When you are finished, the surface should be totally dry and as smooth as possible.
If you notice a deeper scratch, it requires special attention. Mask the undamaged paint around it with tape. Then use a paint cutting compound to remove an inch or so of the paint surrounding the gouge. Doing so will make blending the new paint with the old easier. Apply the paint in thin layers until it gets to just below the level of the surrounding clear coat. Leave up to 30 minutes between coats. Now it's time to apply the clear coat so that it is just a bit above the surrounding area, leaving the job to dry for about a day. Then flatten the area using fine 2,500 grit wet and dry sandpaper or an abrasive paint cutting compound. Use a circular motion to smooth the area.
Finally, after about 48 hours, give the area a polish and wax to provide an added shine. It probably goes without saying, but the rain is no more your friend than is direct sunlight. It will streak your careful work.

Applying touch-up paint to your car is, in some ways, all about timing. You don't want to rush to put additional coats on top of others without allowing adequate time for drying. That being said, you should also get back to the job no more than 24 hours after finishing the application of your primer or base coat. Freshly dried paint is more porous and is therefore able to accept and absorb the next coat. If you wait too long, the existing coat will become harder and less permeable.
Another seemingly obvious priority when touching up your paint is to ensure that you have the correct color. That's not as easy as it may sound, and it definitely isn't something you can just eyeball. Reputable companies such as TouchUpDirect provide a guarantee that enables you to input your car's make, model, year and color to receive the exact factory color it had when it left the manufacturer.
When Using A Touch-Up Jar

If the repair job at hand covers an area larger than the eraser on a pencil, consider using a product such as TouchUpDirect's EcoJar. The tapered brush tip and specially developed ergonomic cap make this item particularly useful when controlling the flow of paint for those larger-scale jobs.
In general, coats that are even, light and consistent are the way to go. Avoid applying one thick coat, which is virtually guaranteed to clump. Remember to let several minutes pass between light coats.
Using A Touch-Up Pen

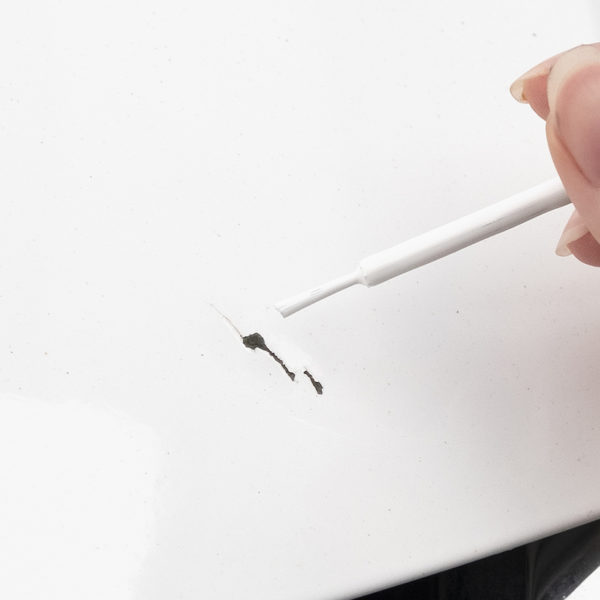
Pens are the ideal way to deliver just the right amount of paint to small imperfections such as dings, minor scratches and impact flecks that are the inevitable result of day-to-day driving. If you can dab it, the touch-up pen can do it!
Resist the impulse to press hard with the pen as you are applying your paint. Although doing this seems like the best way to get the paint absorbed into the surface, all that will actually end up happening is that the pen tip will be damaged.
In addition to destroying your pen, being too boisterous with your pressure level can also make your job more difficult in another way. You might actually compromise the appearance of lower coats of paint that you have recently applied.
Using A Touch-Up Can

When you need to paint a larger area such as an entire panel, neither a touch-up jar nor a touch-up pen will be the right tool for the job. Instead opt for spraying your paint with a product such as TUD spray. Choosing this method of delivering paint will enable you to cover a larger area more evenly and effectively. What’s more, you will save yourself a great deal of time.
Practice makes perfect, and this maxim certainly applies to applying spray paint to your car. Before using, shake your water-based aerosol lightly; shake urethane-based paint well. For both, remember to shake them frequently as you paint.
Using a piece of cardboard or a test card, practice your spraying pattern before attempting it on your car, holding the can six to eight inches from the surface.
Apply the paint in light, even coats to reduce drips and runs and to bring about a smooth and even coverage.
Create edges extending about a half-inch around the affected surface. Move in a back-and-forth pattern left to right and then right to left. Leave half an inch of overlap on each pass of the spray can to avoid the dreaded zebra stripe effect.
Between coats, allow 15 to 30 minutes. The paint should be dry to the touch before you start up again.
If at all possible, do this job in a sheltered area that will not be affected by wind, sun or rain.

How to Use Touch Up Spray Paint on Car
Source: https://touchupdirect.com/blog/tips-applying-touch-paint-car/
0 Response to "How to Use Touch Up Spray Paint on Car"
Post a Comment